If you are starting to code with a team, you will hear the phrase “Send a PR” or “Open a Pull Request” constantly. But what does that actually mean?
This guide explains the Pull Request (PR) simply, helping you understand how developers collaborate without breaking things.
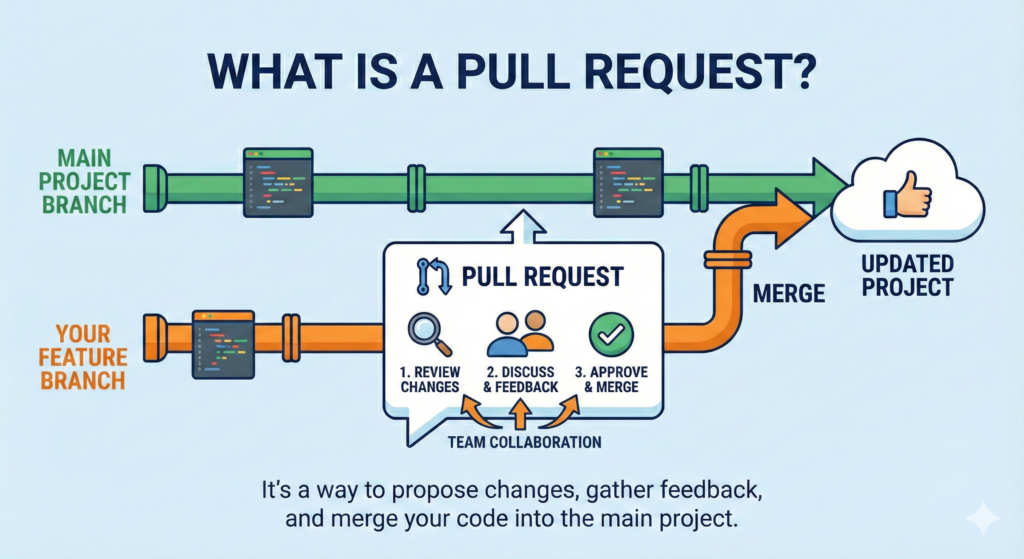
What is a Pull Request (PR)?
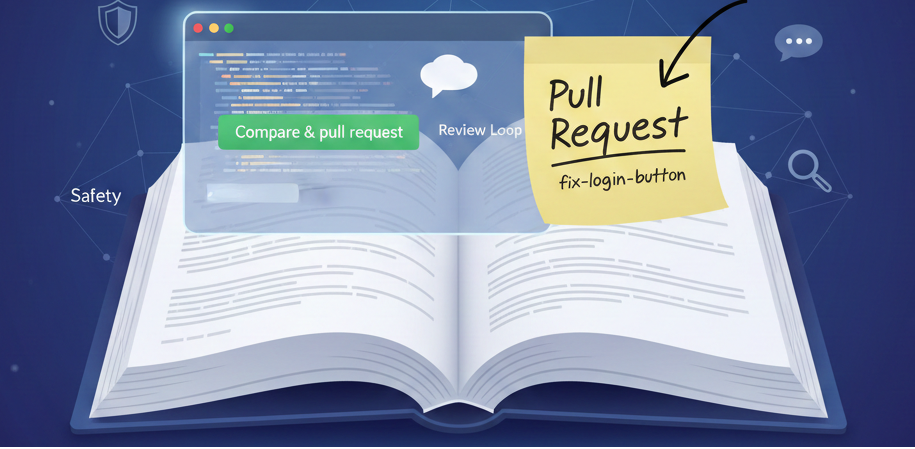
Imagine you are writing a book with a friend. Instead of writing directly on their pages, you write your ideas on a separate sticky note and stick it on the page. You then ask your friend: “Hey, can you check this note and see if we should add it to the real book?”
In GitHub terms:
The Book is the main codebase (often called the main branch).
The Sticky Note is your separate workspace (called a branch).
The Question you ask is the Pull Request.
Why are PRs Important?
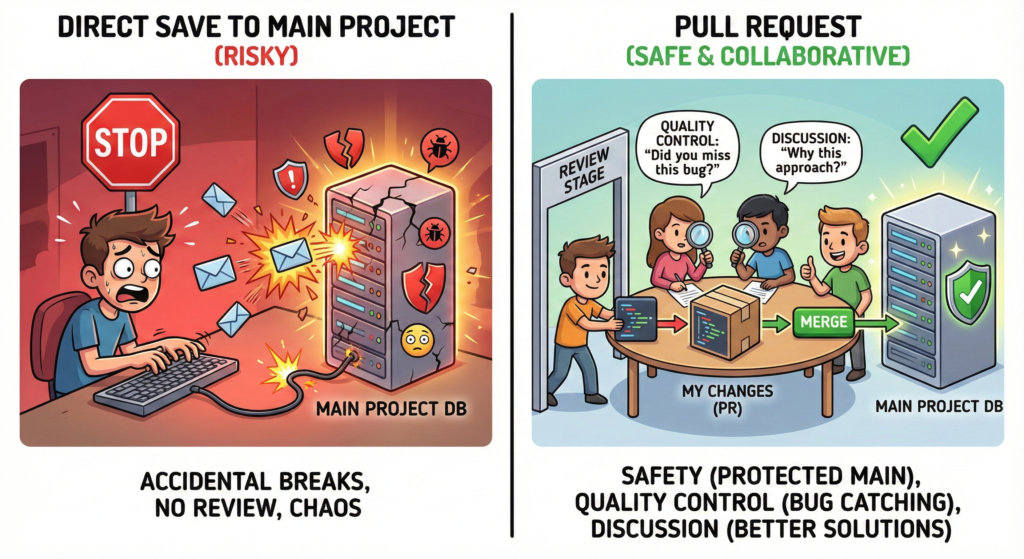
You might ask, “Why can’t I just save my code directly to the main project?”
Safety: They prevent you from accidentally deleting or breaking working code in the main project.
Quality Control: Your teammates can read your code before it is final. They might spot a bug you missed.
Discussion: It creates a space to discuss the code. Teammates can ask, “Why did you do it this way?” or suggest a better solution.
How a Pull Request Works (The Flow)
Here is the step-by-step lifecycle of a PR:
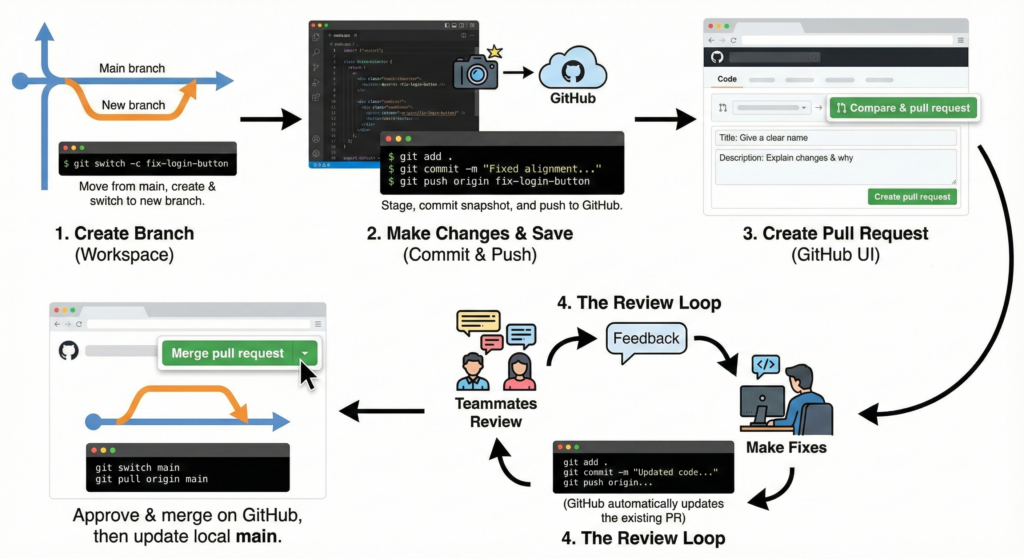
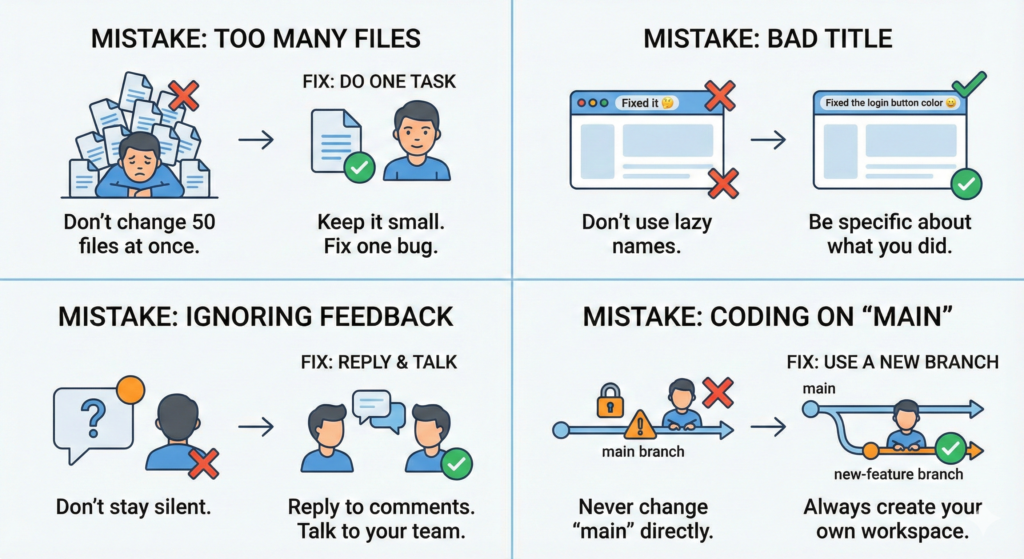
Step 1: Create Your “Workspace” (Branch)
First, move away from the main project so you can work safely. Create a new branch with a descriptive name.
Command: git switch -c fix-login-button (This command creates a new branch named fix-login-button and switches you to it.)
Step 2: Make Changes and Save (Commit & Push)
Write your code or fix the bug in your editor. Once you are done, you need to save these changes and send them to GitHub.
Commands:
Stage your files:git add .
Save the snapshot (Commit):git commit -m "Fixed alignment on login button"
Send to GitHub (Push):git push origin fix-login-button
Step 3: Create pull request (GitHub UI)
Now that your code is on GitHub, you need to open the request.
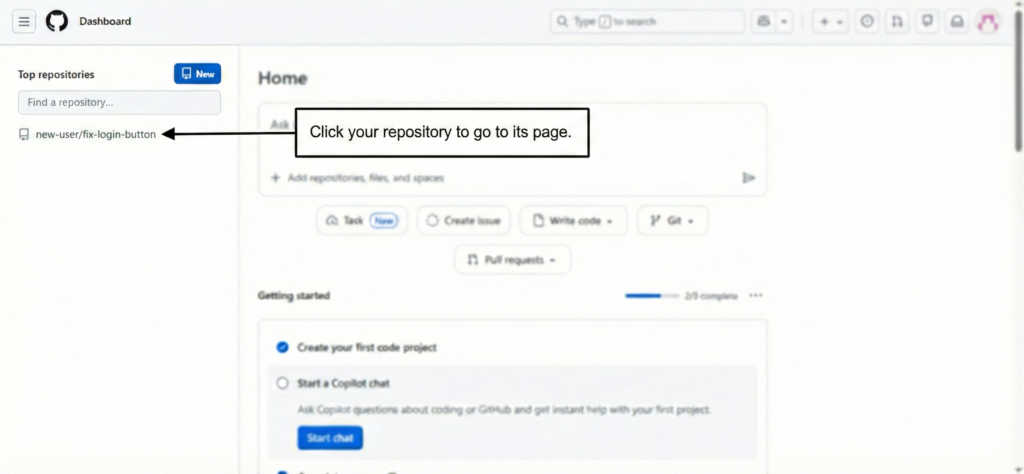
1. Go to your repository on GitHub.com.
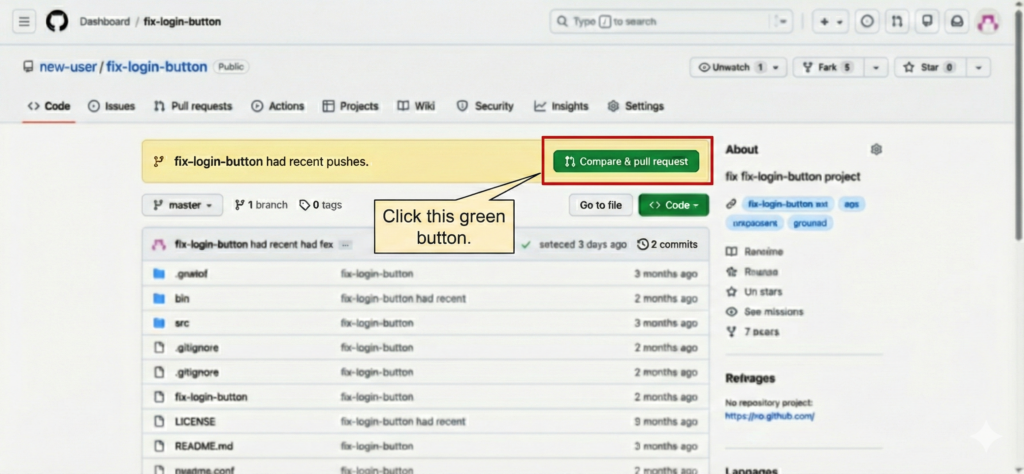
2. Click the green Compare & pull request button.
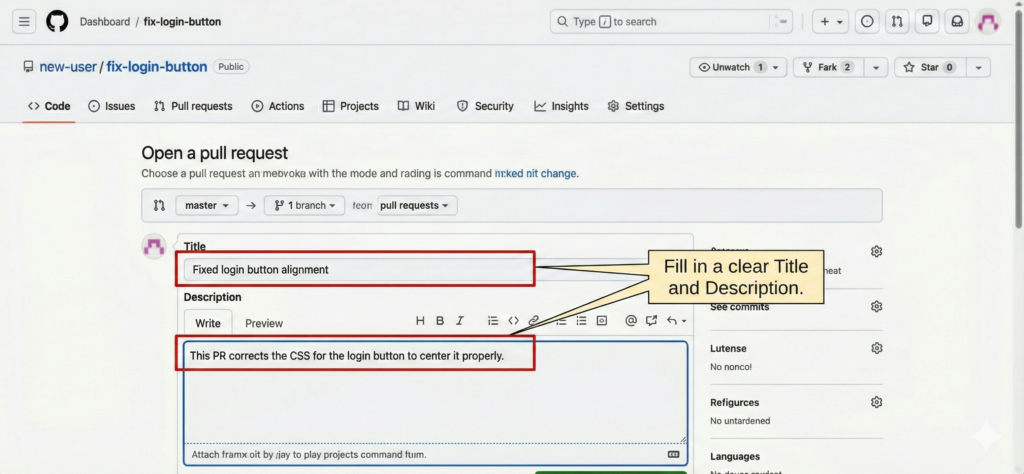
3. Title: Give it a clear name. Description: Explain what you changed and why.
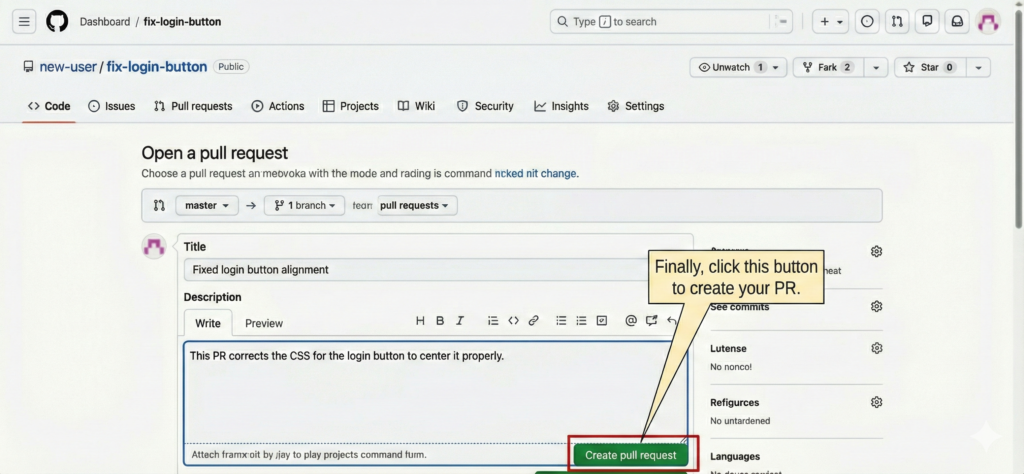
4. Click Create pull request.
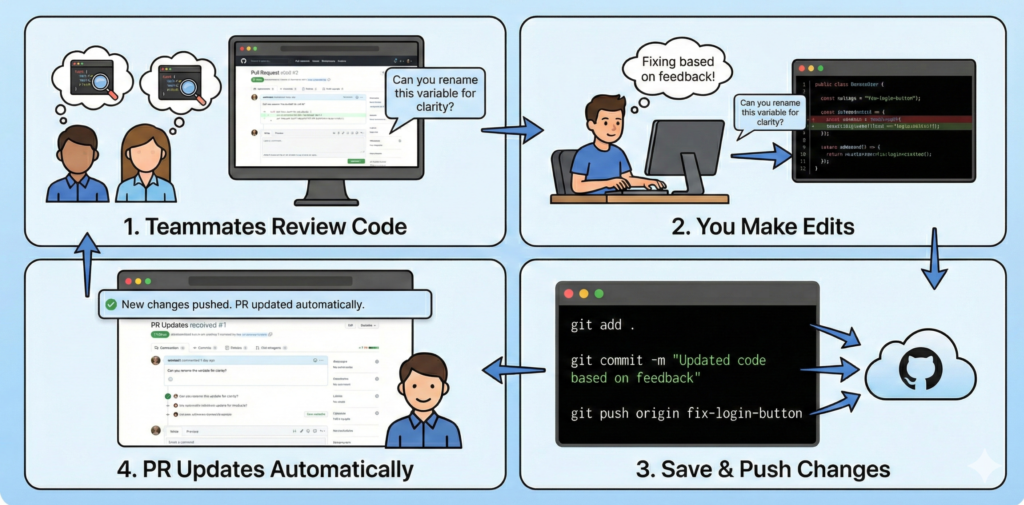
Step 4: The Review Loop
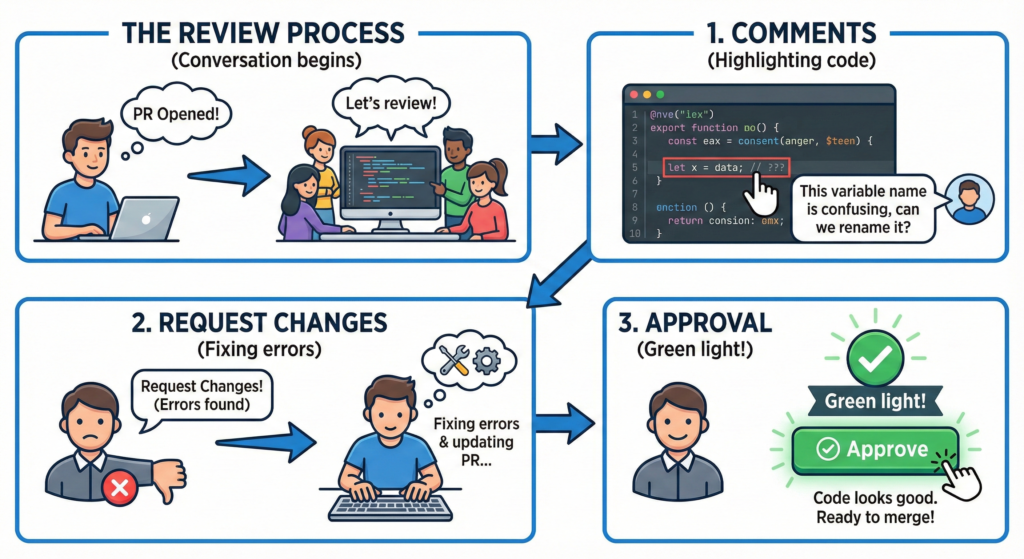
Your teammates will read your code on GitHub. They might leave comments requesting changes.
If you need to make fixes based on feedback:
Edit the files on your computer again.
Run the save commands again: git add . git commit -m "Updated code based on feedback" git push origin fix-login-button
(GitHub automatically updates the existing PR with these new changes.)
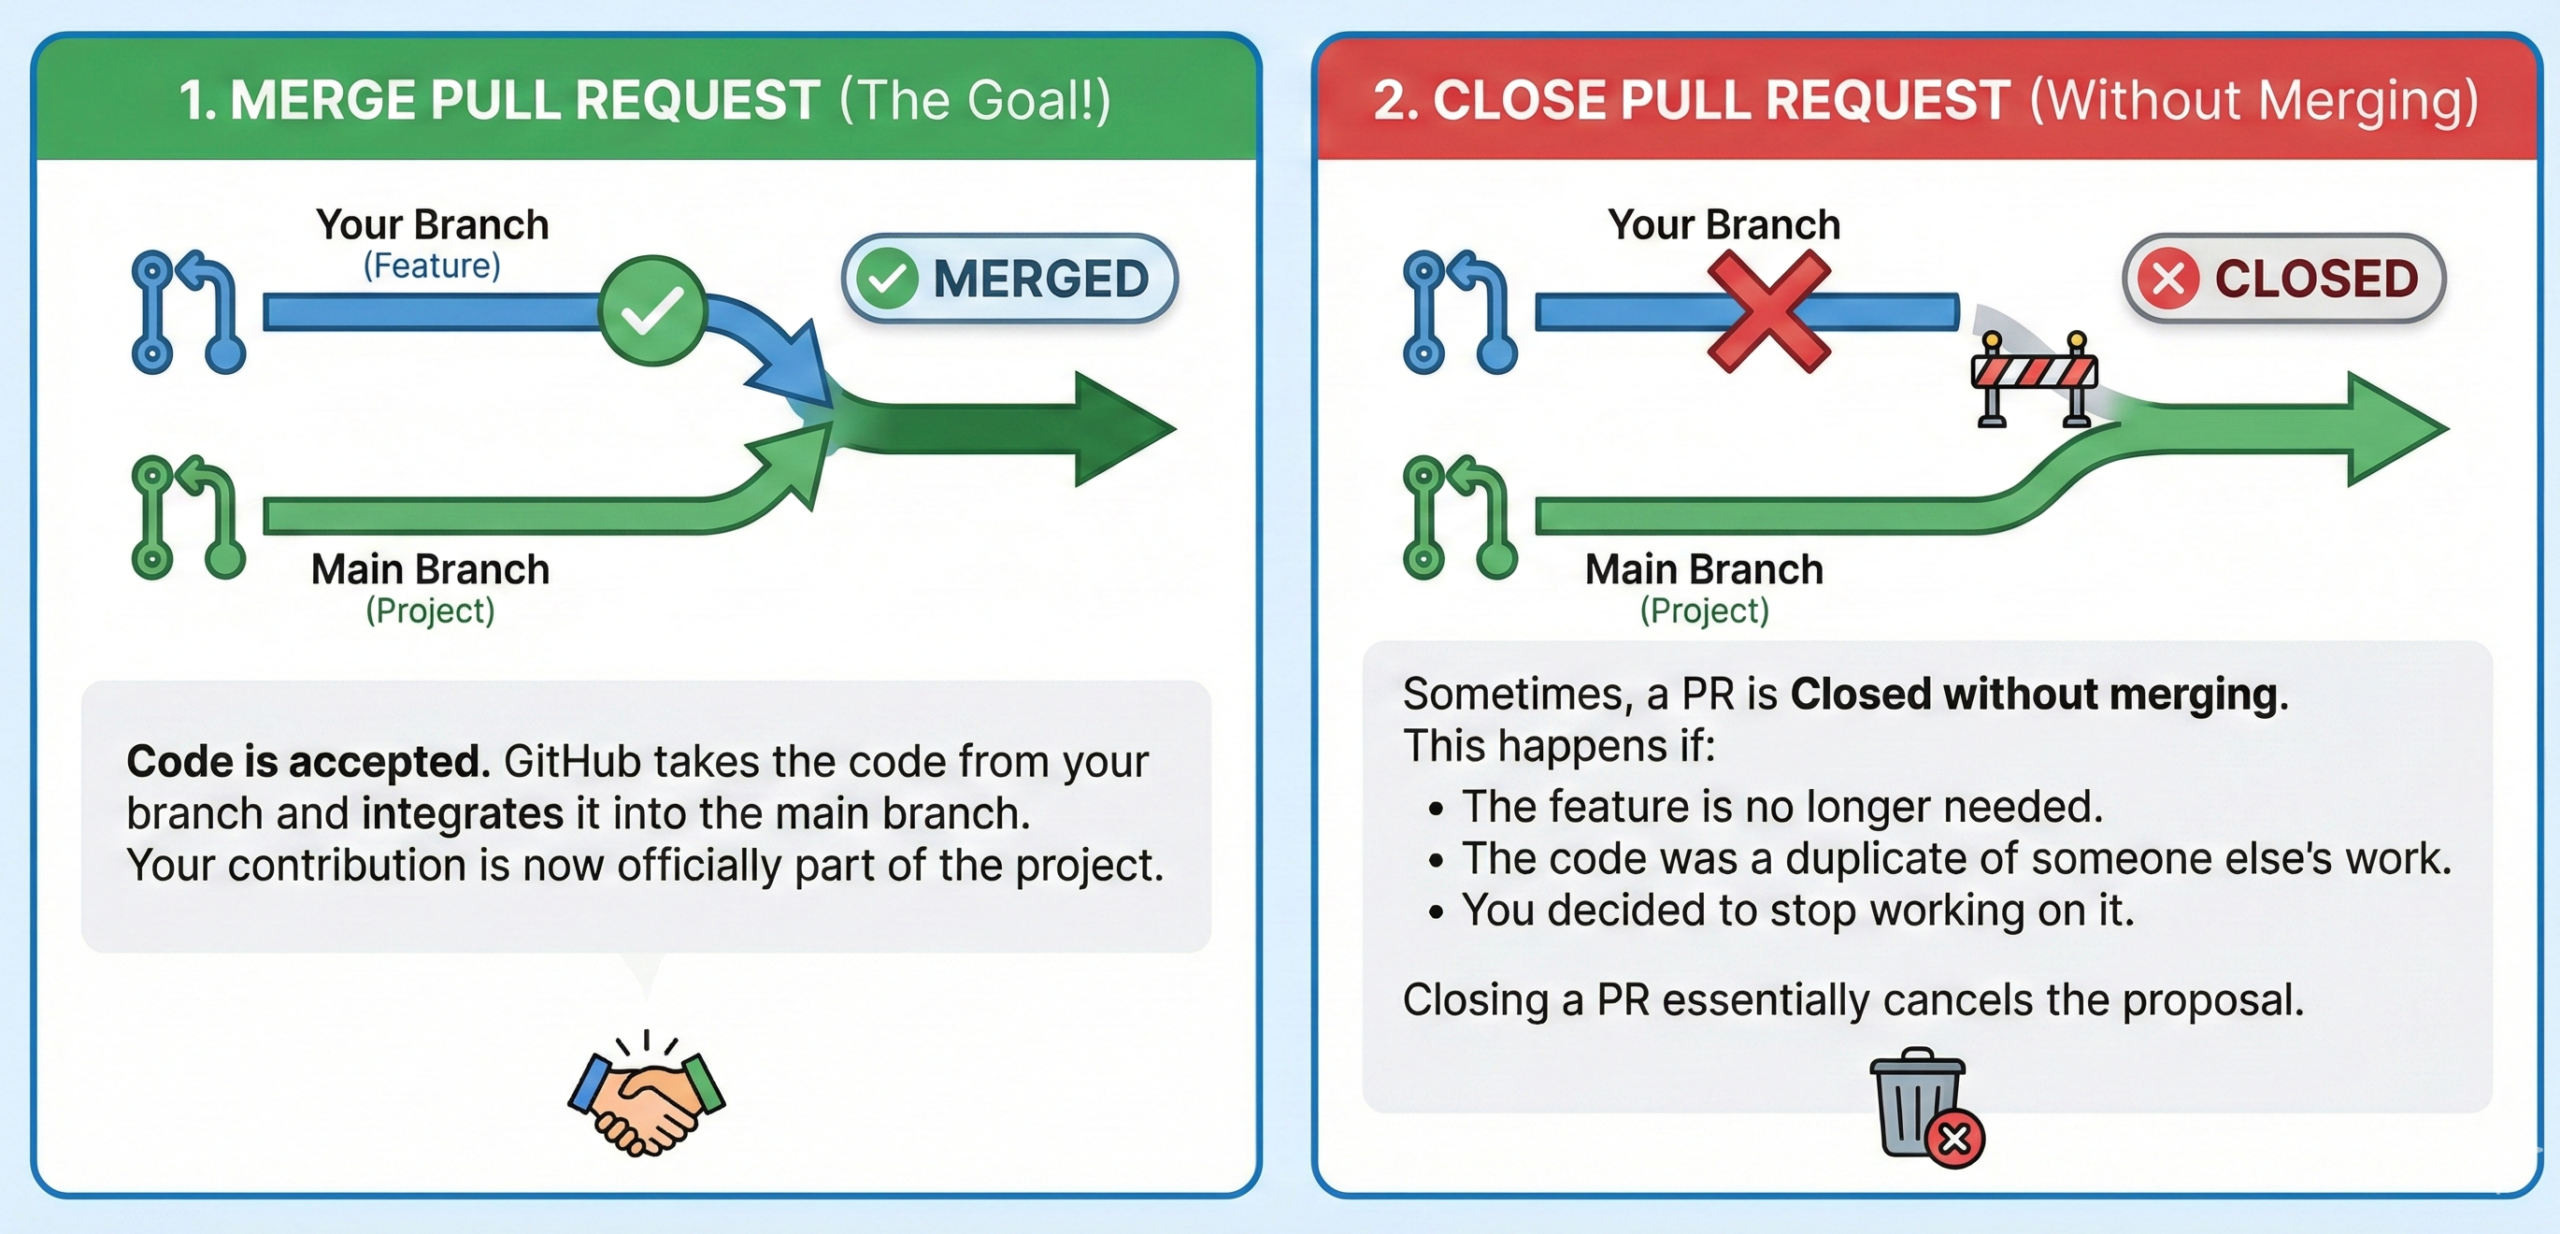
Step 5: Merge
Once the team approves your work, click the green Merge pull request button on GitHub.
Final Cleanup: Now that your code is in the main project, you can switch back to main and update your local computer. git switch main git pull origin main
The Review Process
Once you open a PR, the “Code Review” begins. This is a conversation between you and your team.